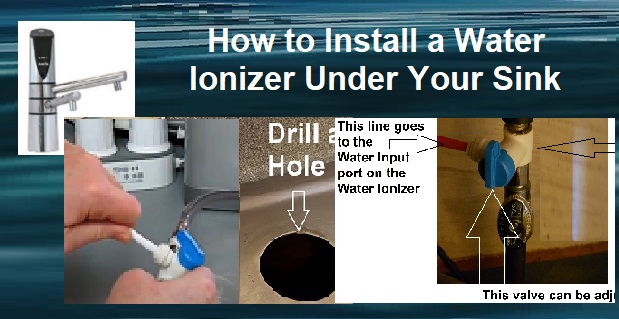
How to Install a Water Ionizer Under Your Sink
Posted by Alkaline Water Plus on 21st Sep 2021
1. Pick a Water Ionizer
First decide on a strong water ionizer that you know will not leak and will give you the levels of ionized water you want. When you put a water ionizer under your sink it's out of sight, so a leak-free water ionizer is essential.
LEAK-FREE: Is the water cell strong enough to never develop a leak no matter how many years you have it? The best water ionizers for water cell strength are the H2 Water Ionizers. I have never heard of an H2 water ionizer developing a leak. Always check with your water ionizer representative to ensure you are using the right kind of water ionizer for under the sink if you want to use any other brand than the H2 water ionizers.
CONTROLS: Do you want the controls under-sink or at the faucet? You can set up your under-sink water ionizer to simply operate with a lever (like a simple water filter) if you want. If you are mainly going to use the water ionizer for drinking and you plan to just set the machine at one level for all the family to drink the same, then a simple under-sink kit with special filter faucet is fine. If you want all of the controls for your water ionizer at your fingertips, then the only one I recommend for that is the Delphi H2. Go to the Undersink Water Ionizers page to explore the types of water ionizers and faucets that are available for under the sink.
2. Drill a Hole
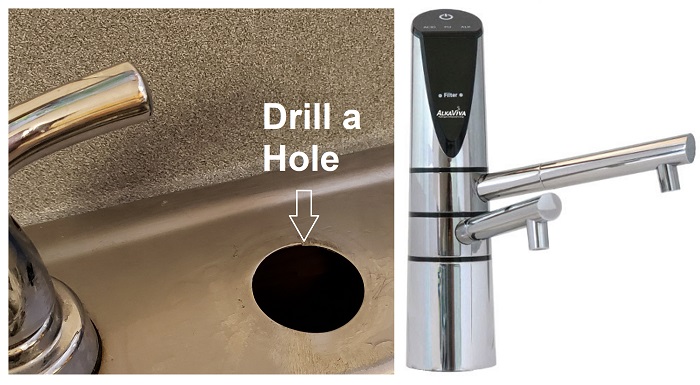
Second, you will need to drill a hole in your sink or counter-top to place the faucet. You may already have a hole pre-drilled, such as for a soap dispenser, so in that case you could decide to use that or drill another hole. The size of the hole will be noted on the product page or in the user manual for the water ionizer or under-sink faucet you choose.
The main idea is that you need the hole large enough to fit the tubes through, but not so large that there is nothing for the faucet to hold onto. In the event your pre-drilled hole is too large, you can most likely find a matching circular, holed, plate of some sort at the hardware store or have a handy-person make it for you.
3. Connect to Plumbing
In order to supply water to the water ionizer you will need to install an angle stop adapter or other similar fitting just above the shut-off for your cold water line. [See 1-minute video at this url if you don't see it below. https://www.youtube.com/watch?v=FC0DaFMvFfE]
The fitting you install needs to itself be a shut-off, so that you can turn off the water to your water ionizer whenever you want. Most water ionizers use 1/4 inch hosing, so make sure the opening for the supply hose fits that size.
4. Electric Supply
Make sure you have an outlet under your sink. The outlet should be a Ground Fault Circuit Interrupter (GFCI) outlet. This is the best kind to protect your water ionizer from surges.
Most water ionizers have standard 5 foot length cords, so make sure the outlet you plan to use isn't further away than that. You should never use an extension cord with a water ionizer.
5. Hook Up Water Ionizer
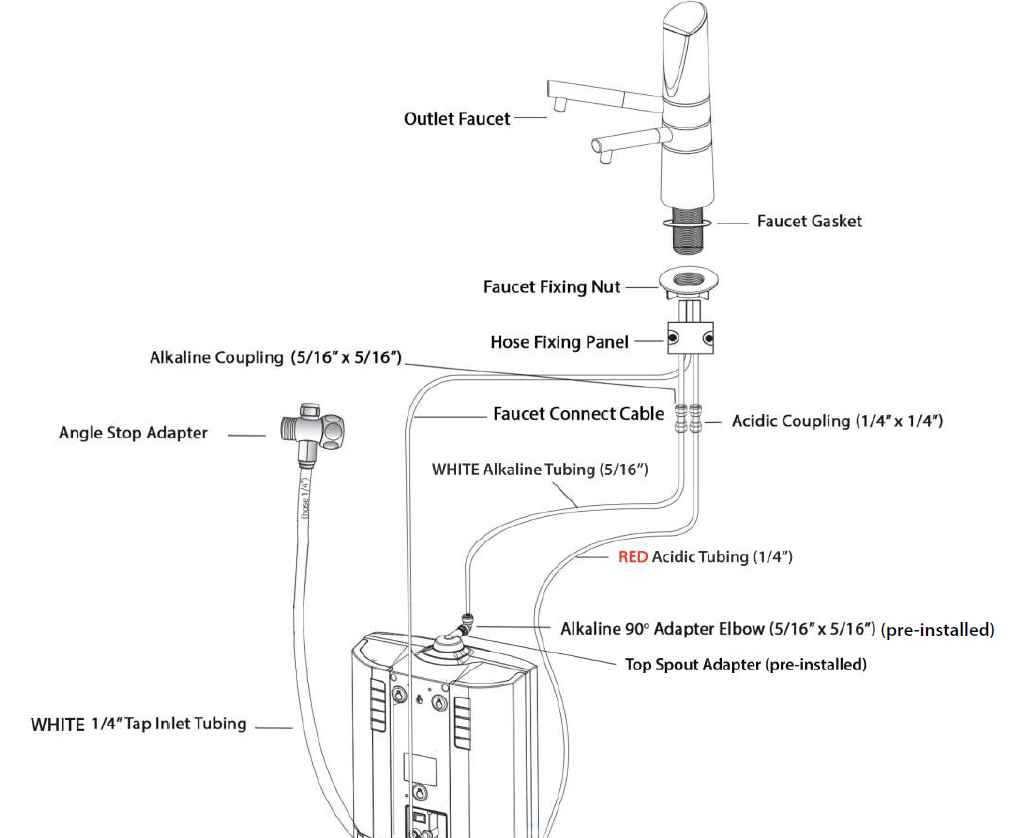
Once you're done with the above essentials, refer to your user-manual to hook up all the tubes in the right places. Prior to doing this, you'll need to remove plugs on the various ports. The next section is important for this.
6. Use Care With Quick-Connect Plugs
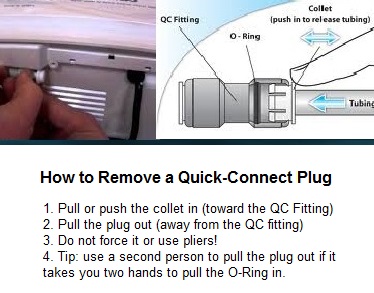
Whenever you use quick-connect fittings you need to use care to remove plugs correctly. Don't pull and yank them.
There is a collar around the fitting that releases the tube when you pull it in. Here's a diagram of what to do.
7. Installing the Water Ionizer (Diagram)
This is a comprehensive diagram, showing the full installation protocols for the Delphi H2 Under-Sink Water Ionizer. I suggest to hook all the tubes to the ionizer up at your counter-top, then move it under the sink when ready. This is not only more comfortable, but it's also easier to see what you're doing and make sure it's all "right" before putting it under the sink. Once under the sink you'll need to use the diagram once more to connect each line to it's proper port.


